Convert Window/Door Sensor to Handle Sensor
In order to prevent my venetian window blinds to go down on timer in front of my open window-style terrace door, potentially locking me out, I needed to know if the door handle was in the “open” position. However, I did not want to use a battery powered radio sensor, but the existing door open/close magnetic sensor in the door frame. Here’s my solution.
(Skip the Why and go directly to the How)
Motiviation/The Problem
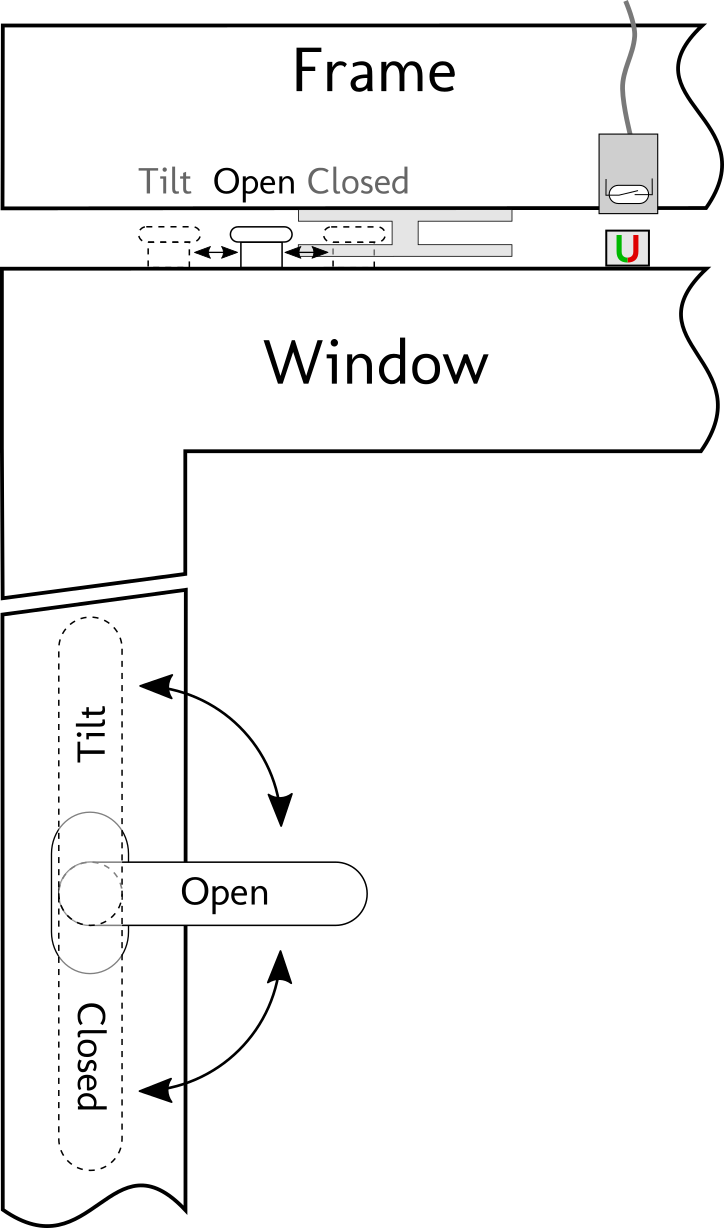
My venetian window blinds are controlled by a Raspberry Pi. When the sun comes around to our window front around noon, in summer I lower the blinds, timer controlled, into their sun-blocking configuration, i.e. down, but the blades horizontal so you can look through them. When – like these days – it is really hot, we love to be in the garden, but to avoid the warm air to get into the cool house, we pull the door closed. The handle is in “open” position, but the door snaps into closed position. The door is basically a large window, so it has no classical door handle, but a window handle that in addition to the “open” and “closed” positions can also be in “tilt” position, allowing the window/door to be tilted a few degrees to have some air ventilation without the door being really open. Now, if the timer triggers and the blinds go down, it may happen that we miss this and find the door blocked by the lowered blinds, more or less locking us out. I still can use my smartphone to open the blinds again, but I thought that it would be better to have the blinds not go down in first place.
When we renovated the house and alongside the windows, I ordered magnetic open/closed sensors for the windows and doors. The actual sensors (reed switches) are mounted in the window frame, a cable coming out hidden in the wall (see also sketch below).
The magnet that operates the reed switch is mounted to the top rail of the window. Opening the window removes the magnet from the switch, so the switch goes from closed to open. This gives me reliable information about the window state, but I did not think of the above blinds/door-pulled-close-but-not-locked scenario, which would require me to also know if the handle is in the open position.
There exist sensors for window handles. However, if you do not build them into the frame before the window is put into the wall, it is rather difficult to add them later, unless you go for battry powered radio solutions. Which I do not like. Batteries are bad for the environment, and they fail you exactly when you need them most, following Murphy’s law to get empty at the worst possible moment (i.e. when you are in the garden and forgot both to bring your front door keys and the smartphone). Also, radio would require me to extend my purely cable based home information/automation system just for the stupid door handles.
Analysing My Options
All around the window are mushroom cams that slide into slot plates when the window is closed, making the window as difficult to break open as possible to be safe against burglars:

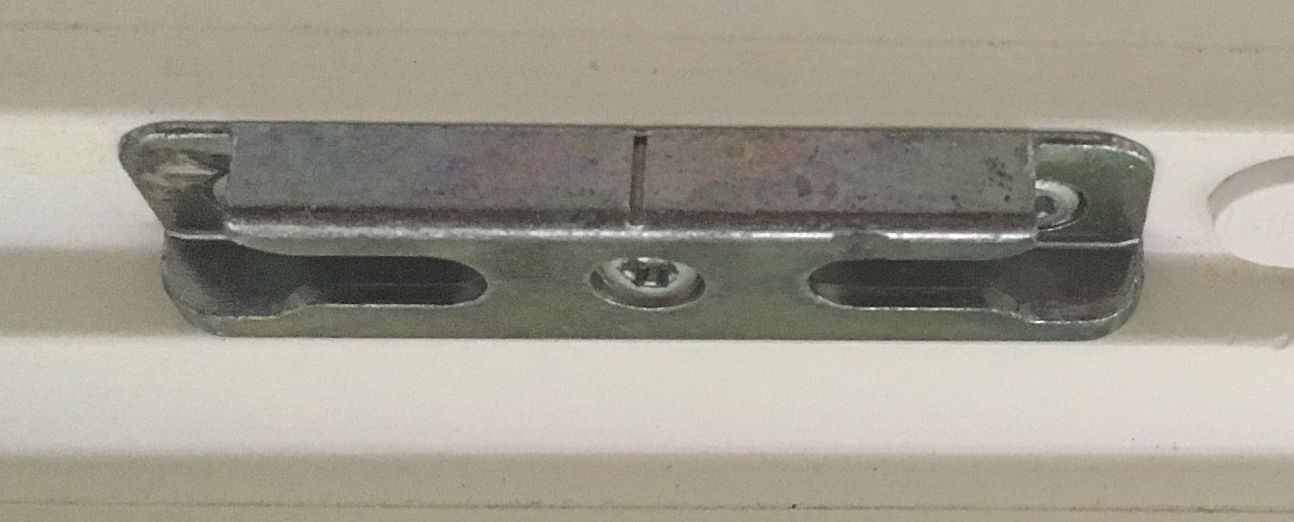
When I move the handle, the mushroom cams of the lock mechanism are moving accordingly:
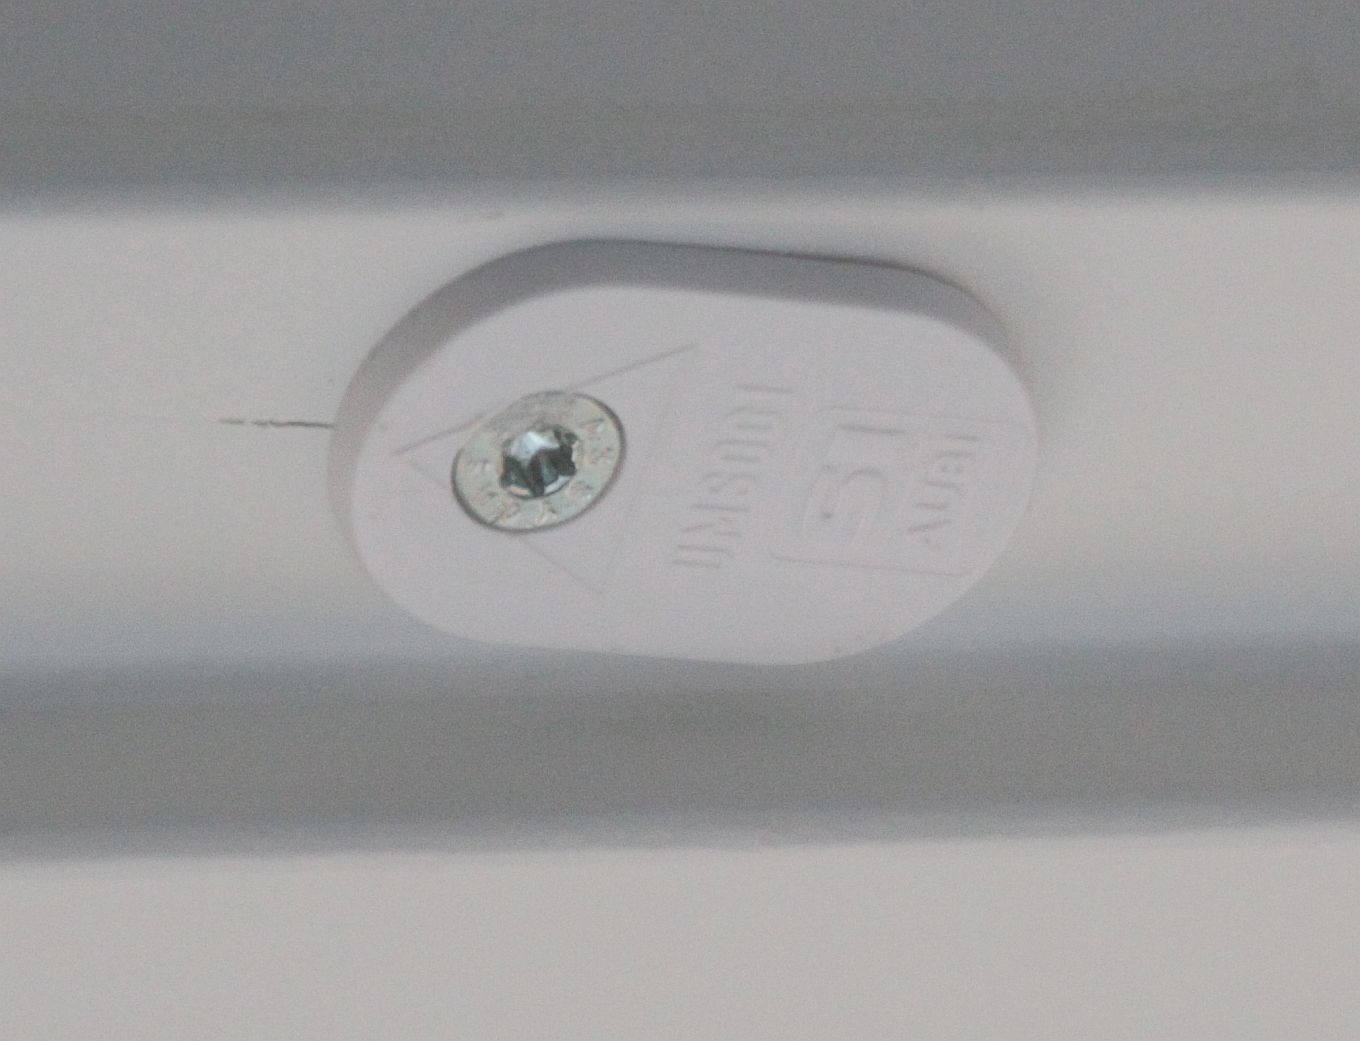
So I arrived at the conclusion that I’d need to query the cam position in some way close to the reed switch and convey this information down the existing cable. My first idea was to put a mechanical switch on the frame somewhere to the cam nearest to the reed switch, so that it is triggered when the cam touches it in “closed” position. Then put the switch in series with the reed switch, and be done. I unscrewed the reed switch, only to discover that the cable was too short to be accessed from the outside, and somehow fixated so it could not be pulled out even by a millimeter. Not an option after all.
Next idea was to connect the magnet to the cam or its rail, so that it moves together with the cam. Looking at some other windows in my house I found that in some cases the manufacturer already did exactly this, and that the rails that move the cams are sometimes accessible and allow the magnet to be screwed onto them. But no luck at my terrace door: The rails were of a different kind with no access to the moving parts, lest having a mounting thread to attach a magnet to.
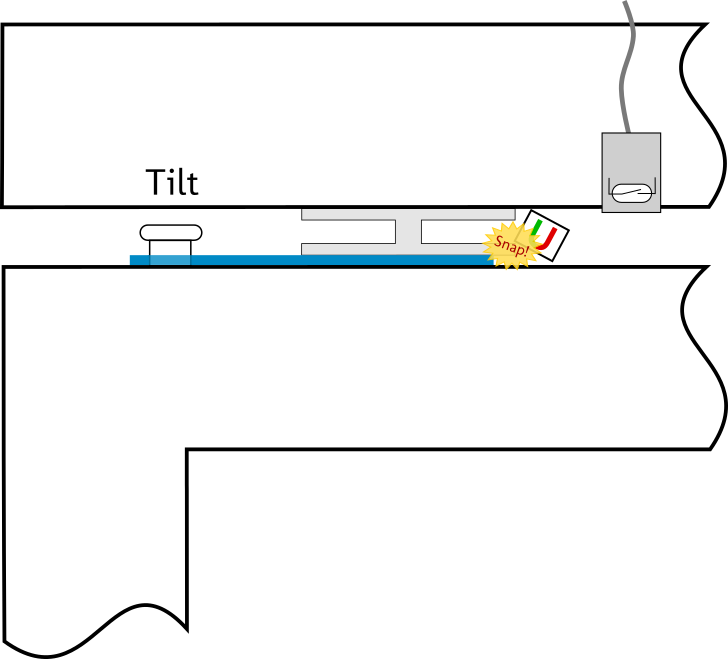
So I fired up my 3D printer and printed a piece of plastic with a hole in it to put over the cam (represented in blue in the figure below). The plastic would then extend to reach the reed switch. I’d glue the magnet to the plastic bar at the position where the closed cam would have it right under the reed switch, but where it would be pulled away when the cam moves to “open”. Actually, that worked!
I thought: Nice, done! But only until I tried to put the window into “tilt” position. The slot plate was right at the position the cam pulled the magnet into when the cam moves to “tilt” position (see also photo below). The magnet snapped off the plastic and I was back to where I started from 🙁
Final Solution
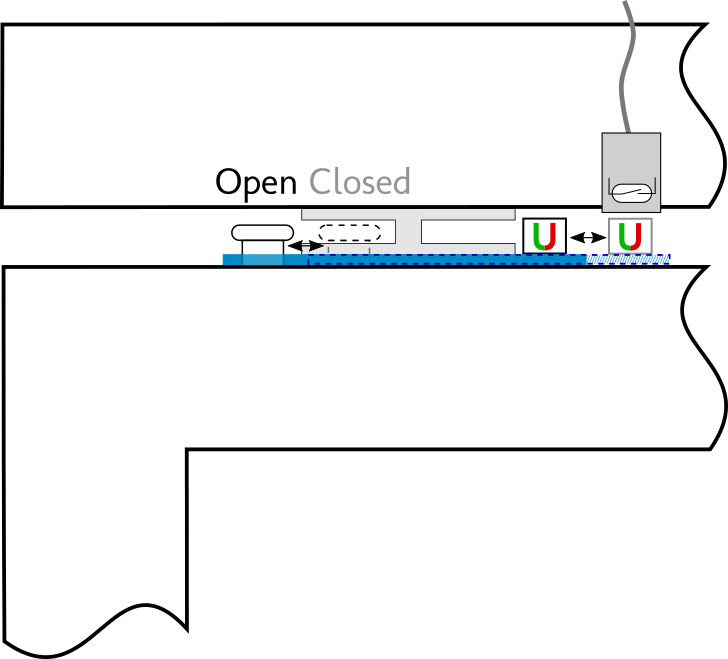
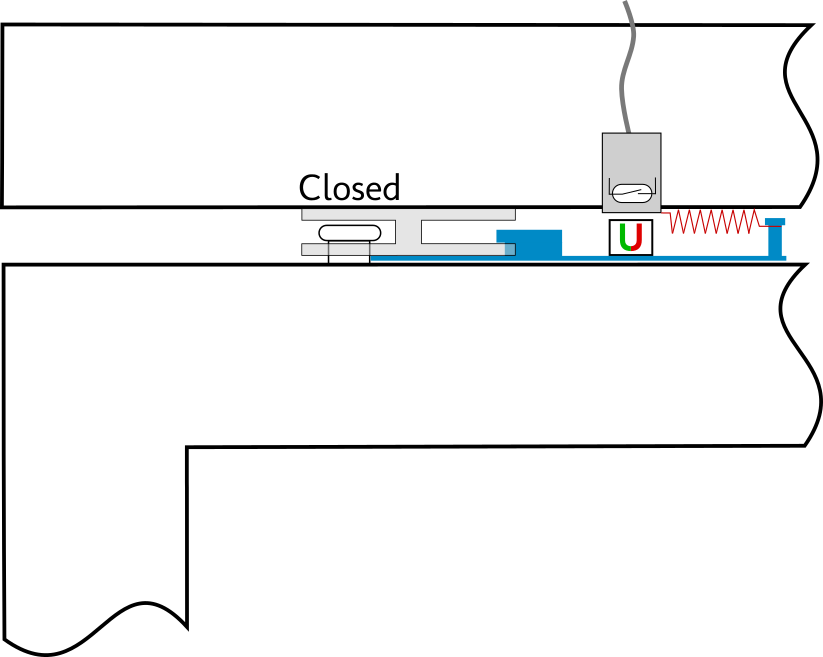
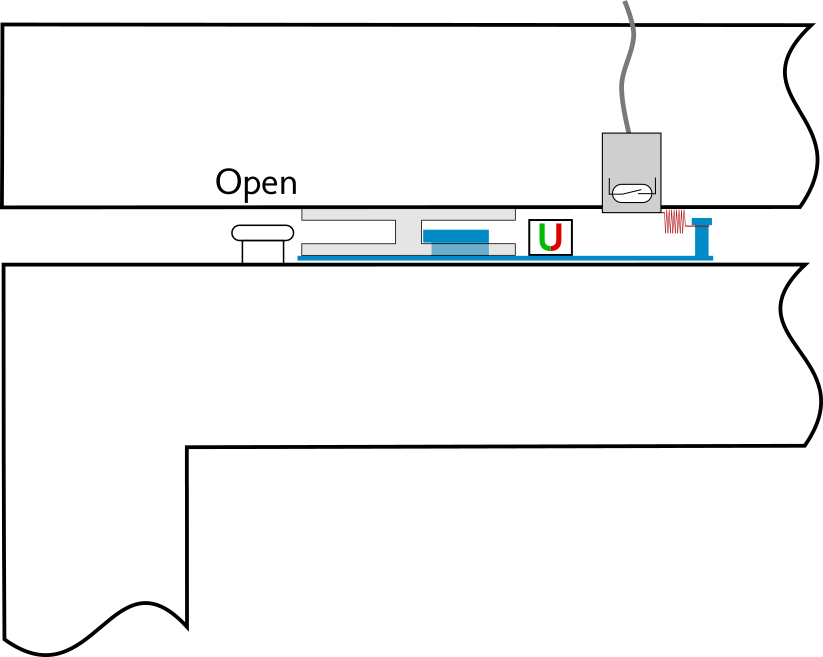
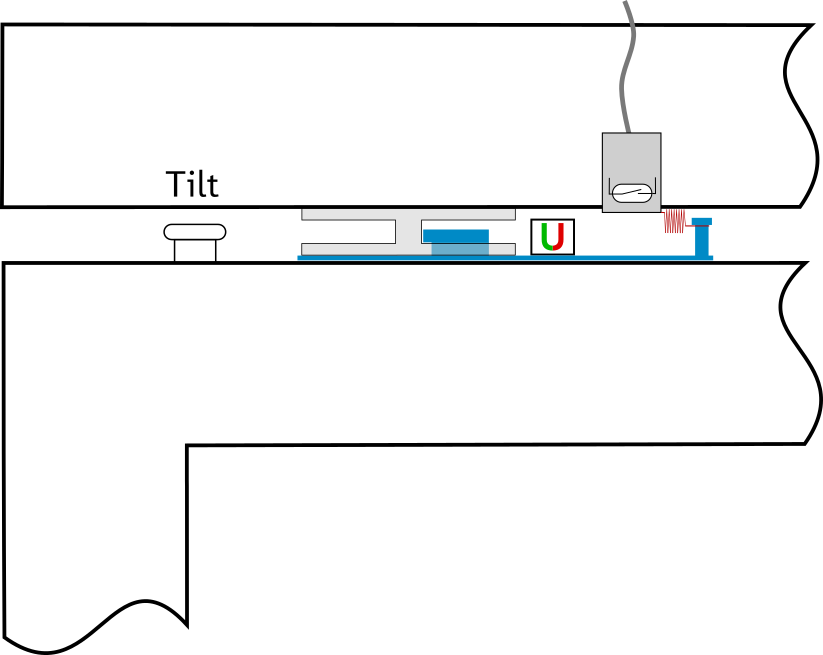
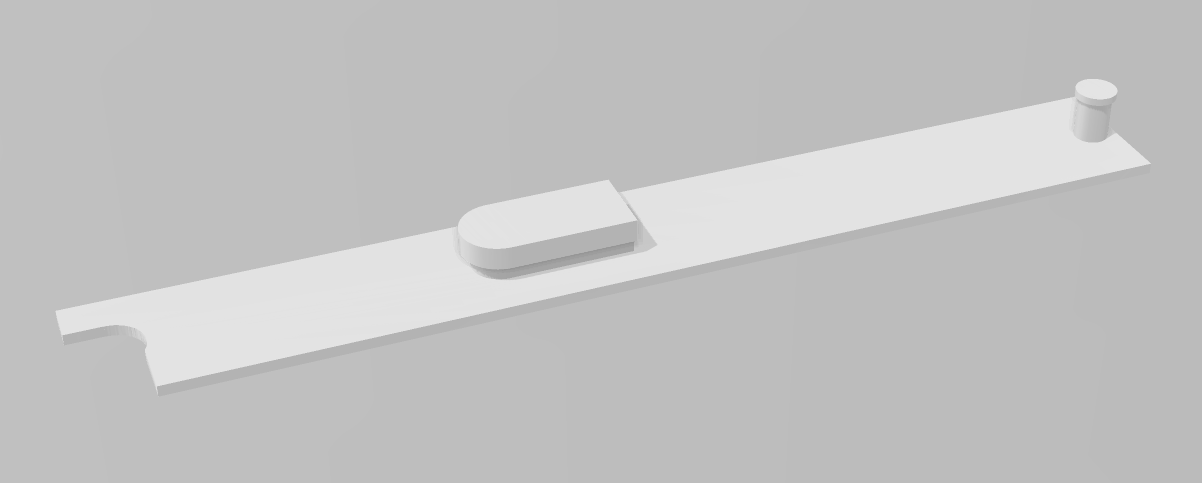
The moving magnet still was the solution in the end. However, instead of having a plastic part on the top window bar moving along with the cam, I went for a plastic part that could slide along the frame and is pushed by the cam, but not pulled back and then too far. It is only pulled back into the “open” position by a tension spring (red in the image):
This works really well since several weeks now!
Real Life
And here is how it looks in reality. Here you can see the tension spring mounted to the reed switch screw. You can see how close the switch is to the slot plate:
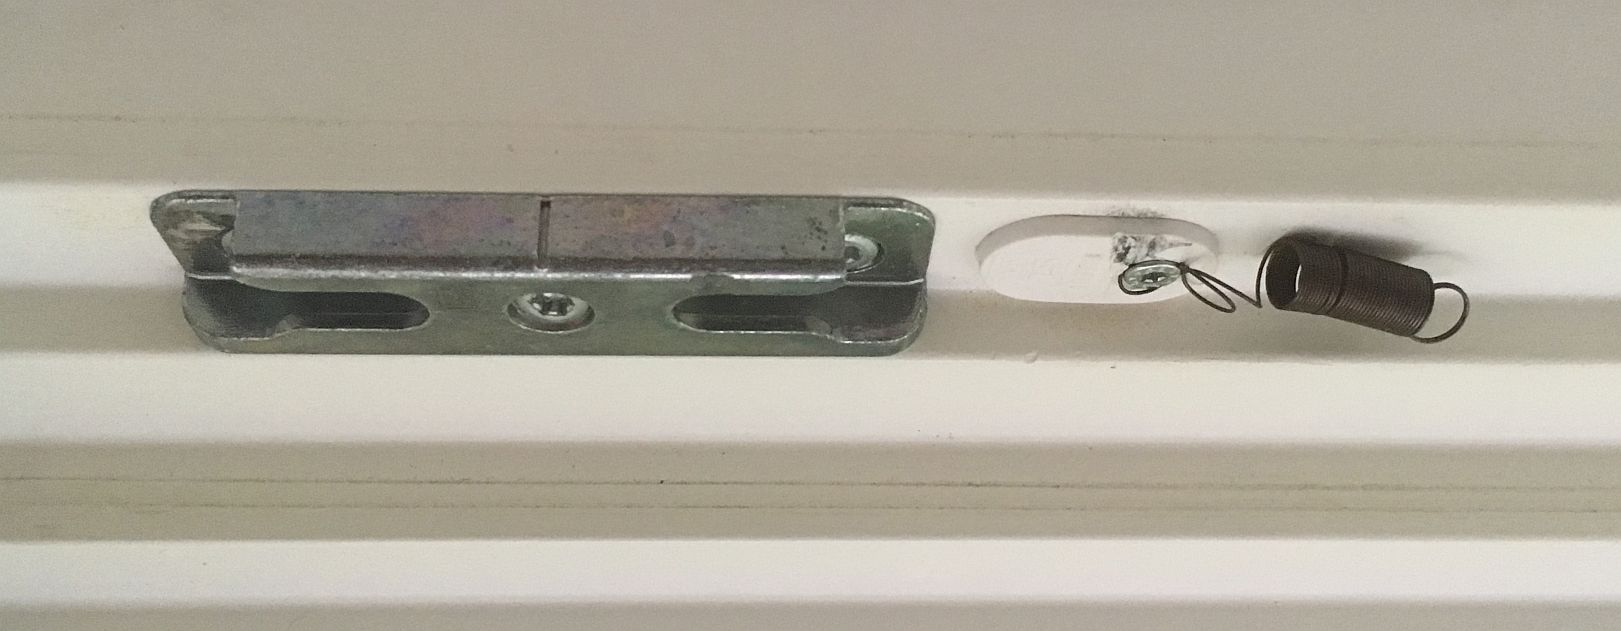
By the way: The tension spring was something I had lying around. I cannot give any technical details, but I guess there is no really strict constraint on the spring constant, size etc., just try whatever you can put your hands on. I guess an elastic rubber band might also work, but these age and break at some point. Still, imagine the tension of a medium elastic rubber band, and you get a feel for the spring I used.
Here’s the 3D printed slider with the magnet already glued into position. Finding the best position for the magnet was just trial & error, fixating the magnet with tape at various positions, closing the door and see if the switch triggers at the correct handle positions. Two things were remarkable: First: The magnet must not be too strong, otherwise the switch would not unlatch in open or tilt position! And: there is a bit of hysteresis when moving from open to closed and then back to open, so the switch-engages-point needs to be very close to the handle being all way to closed position.
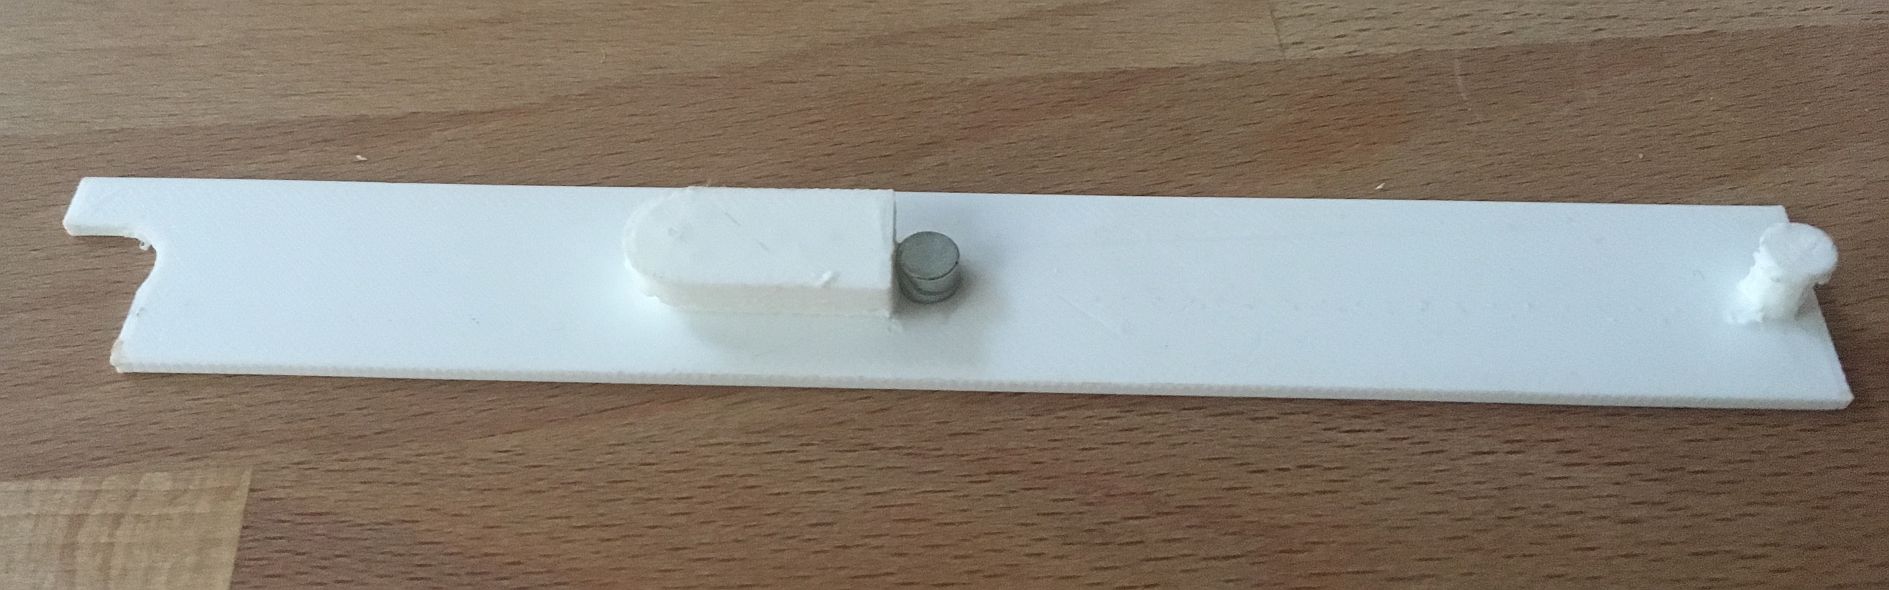
Here are two images showing the slider readly mounted:


This really works well! I was a bit afraid that the slider might tilt and get stuck when moving back into the slot from closed to open, but the narrow space between frame and bar provides enough guidance to avoid this.
Make Your Own
Think that may help you too? You can download my 3D file here or from Thingiverse, but I guess you’ll need to create your own model, since no window is exactly the same. My 3D model is just for guidance, carrying my ideas along.
The slider model was created with Windows 3D builder, which again proved its ease of use and versatality!